Build a Self-Healing A/B Test Workflow with Small Models and n8n


Can we create a workflow that reliably writes JavaScript code for our client-side A/B tests? One that not only writes the code, but also automatically handles the QA for common errors and then self-heals to produce something more reliable?
And can we do all of this efficiently, using small models (so sustainable) and without maxing out our tokens? Say, for less than $0.06 per experiment, or free if you’re able to run all this locally.
I’ve been experimenting with this for a while now, and think I have a system that works pretty well. In this article, I’ll share my findings along with a free n8n workflow you can download and try yourself.
Even if you aren’t interested in this specific workflow, I think this guide will still be useful as a case study for learning techniques and approaches for designing effective workflows with small language models (i.e., generative AI).
Note: this workflow isn’t about replacing developers. It’s about reducing friction in the test development process and lowering costs. Efficiency is the key here; we’re not using Claude Code, we’re not using AI Agents, and we’re not token-maxing.
Now, let me show you how this thing works.
TL;DR: Automated Experimentation with SLMs
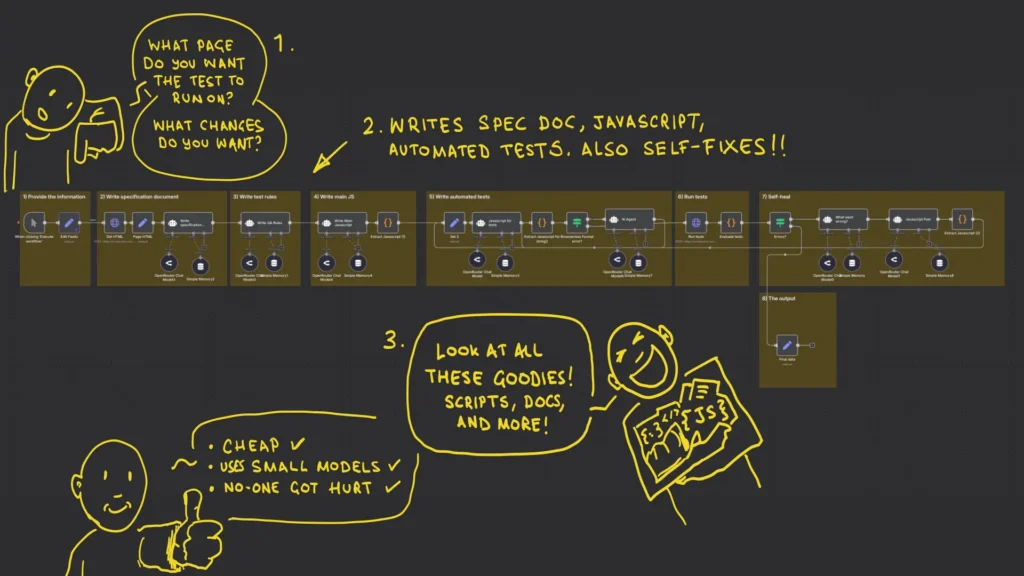
Quite simply, this is what the workflow does: you hand it the URL of the page you want to build your experiment for, along with a description of what you want to do (for example, I want to re-order panels on the page). The workflow then writes a technical spec, generates QA rules, and writes the JavaScript along with some test scripts to validate the change. It also runs a self-healing loop to catch major issues. The result is (I hope!) high-quality code, ready for human validation.
Prerequisites
If you want to use this workflow, you’ll need n8n (self-hosted or a cloud account) and a Browserless API key. You can also self-host Browserless, by the way.
If you want to run code generation locally, you’ll also need Ollama installed (see my previous guide for that). Otherwise, since the workflow is using small models on the cloud using OpenRouter, you’ll need to get an API for that.
Last thing to note before getting into it: this workflow is specifically tailored for writing client-side code and should be adapted for your own tech stack.
Step 1: Provide the minimum information
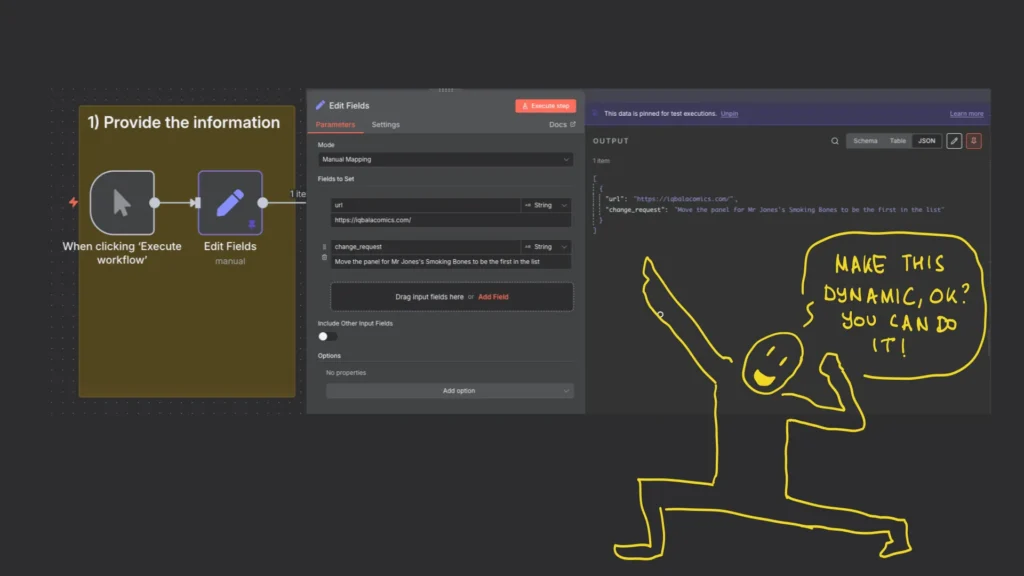
The first step is the minimum information that you need to provide to get this going. For now, you can set these up as variables:
- A URL: The target web page you want to modify.
- A Change Request: The instruction in terms of text. For example: “I want to change the order of my panels on my comics page.”
I’ve hard-coded this for testing purposes, but you can add a node before this (for example, a form node) to take in the required information and trigger the workflow.
Step 2: Fetch the HTML and write specification doc
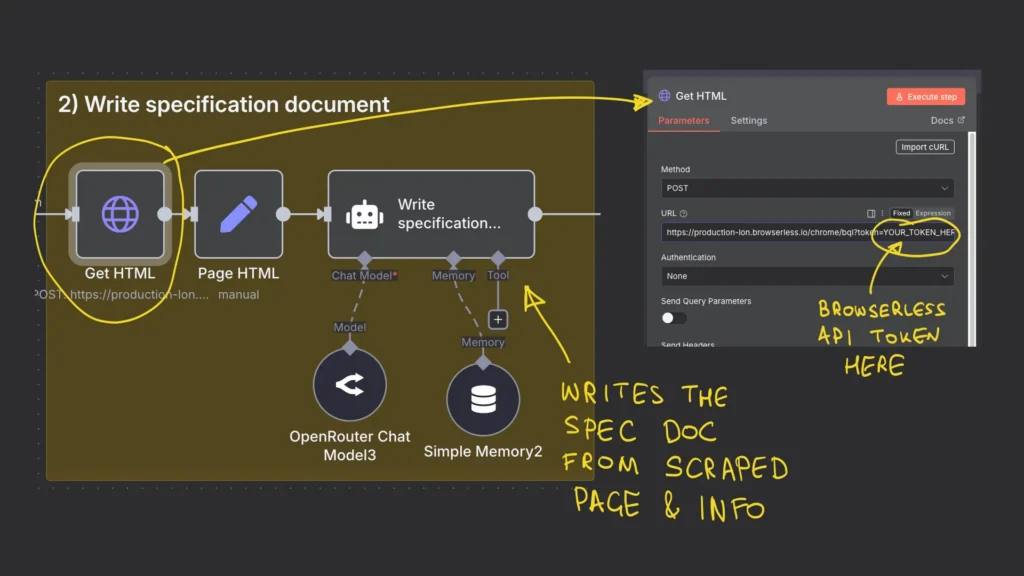
Once your inputs are ready, the workflow connects to Browserless to fetch the HTML for the page in question. You’ll need to enter your API key in the provided placeholder.
Using that retrieved HTML and your change request, a small language model writes the technical specification document. Imagine this document as something a senior developer might give to a junior developer to break down all the changes they need to make and provide very clear guidance on how to write the code.
Step 3: Identify the QA rules
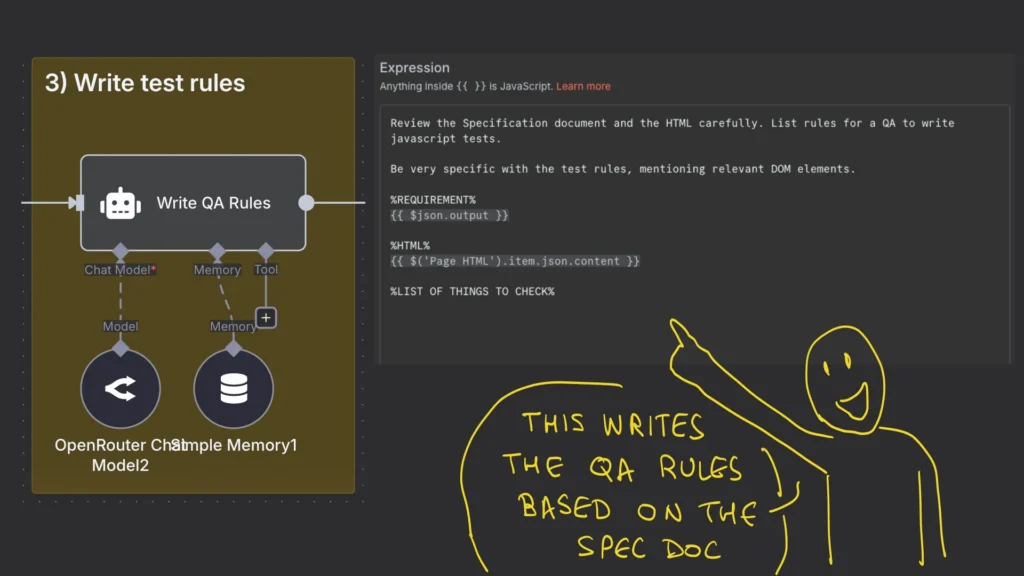
After the technical specification is written, the workflow uses that document to determine what we might want to test to make sure the changes are implemented correctly and that we haven’t broken the page.
You have an option to add a human-in-the-loop step here, by the way. So you can review the documentation and make sure it all makes sense. Modifying or customising the documentation should improve the output of the final code.
Step 4: Write the JavaScript
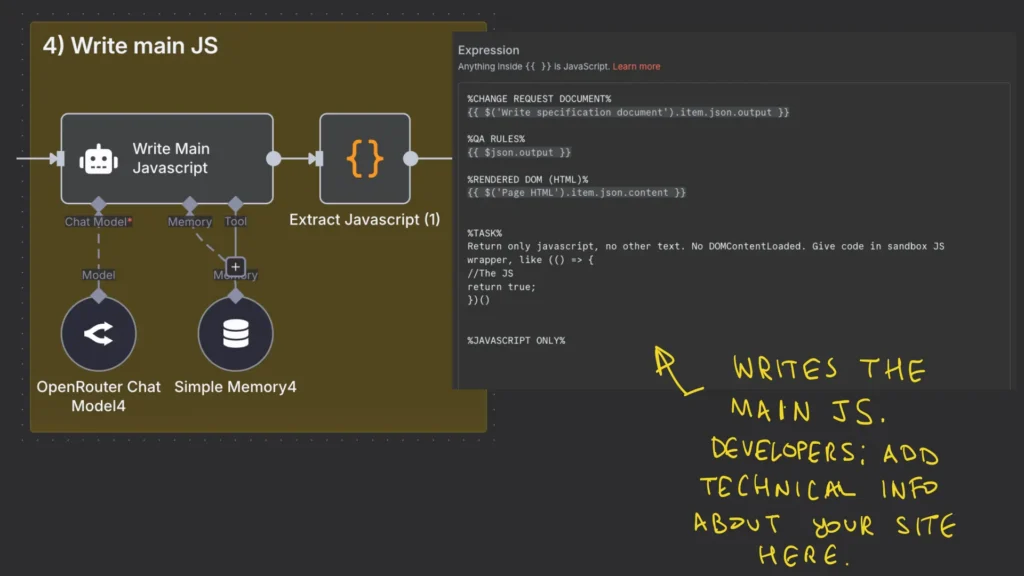
Then, using all this information, we have our language model write the JavaScript. Because we’ve set up the information in the technical specification document first, we should get clean, usable JavaScript as output.
Step 5: Write the automated tests
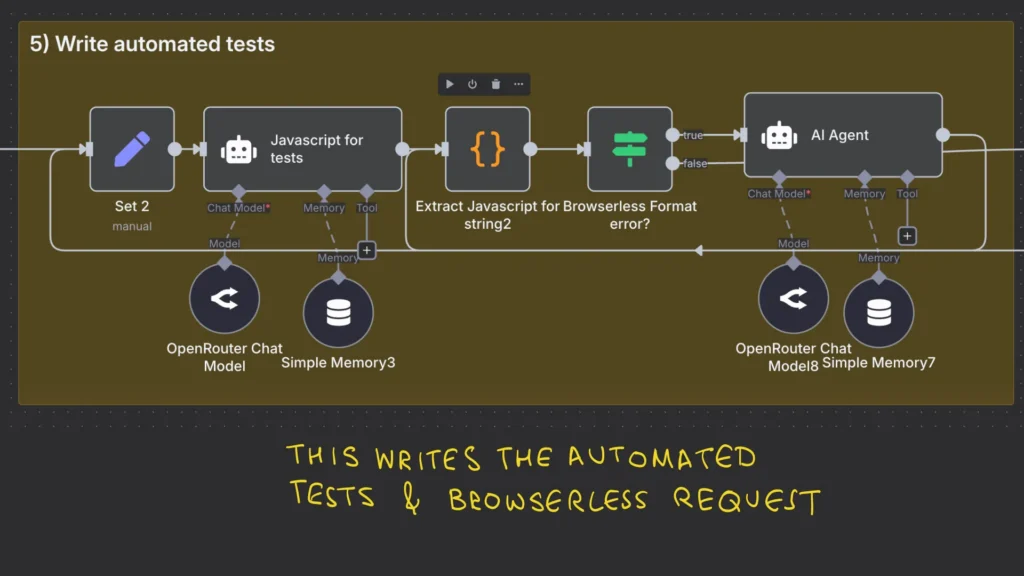
Just in case the language model doesn’t get the code right, this step generates a series of JavaScript-based tests from our documentation. These will be used to validate our changes. All this is packaged up into a nice request bundle to send to Browserless.
Step 6: Send to Browserless for rendering
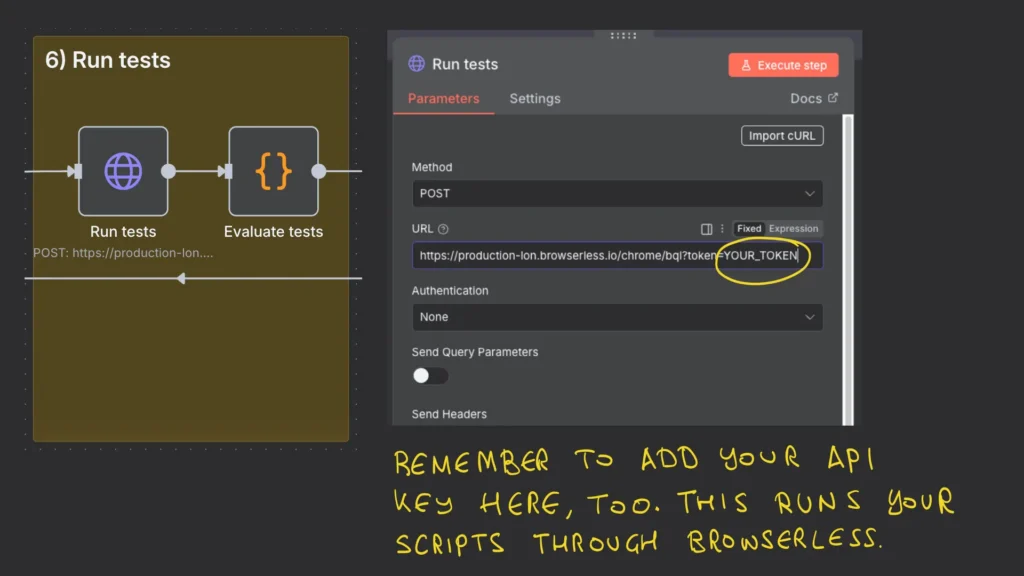
Browserless is, effectively, just a service that lets you run a browser in the cloud. You can self-host an instance, by the way, but for simplicity’s sake, I’m using the cloud-hosted version of the tool.
From a technical perspective, Browserless runs the JavaScript alongside the tests and returns the modified HTML along with the test results. Browserless can also take screenshots if that’s something you want (let me know if you’d like a guide on that).
Step 7: Run the automated self-healing loop
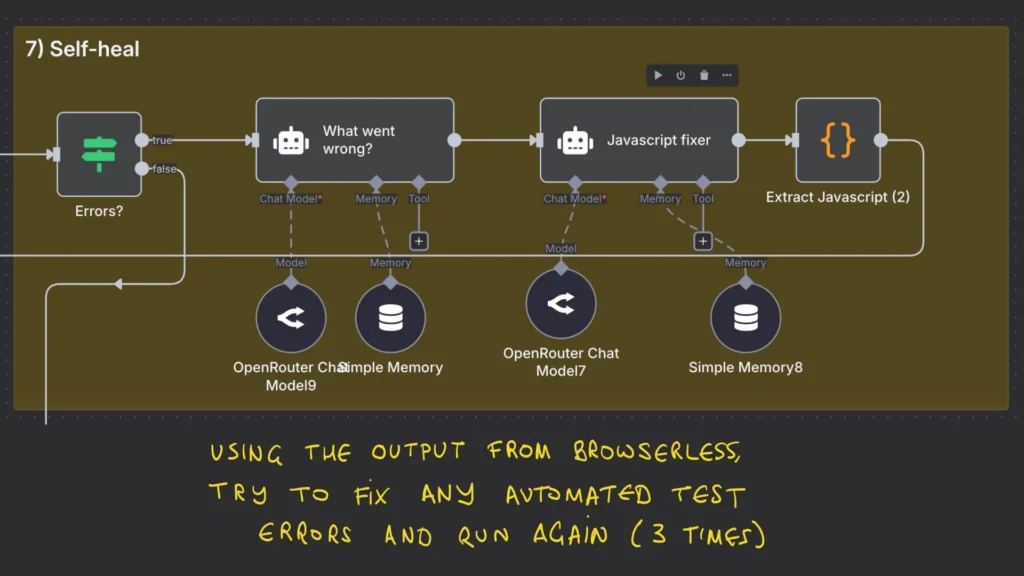
The Browserless output is useful to send back to a small model to fix any issues. I’ve set the number of fix attempts to 3. After that, if the model can’t fix the code, it’s probably up to a developer to take a closer look. I’m not one to token max and have it run overnight. Efficiency and reduced friction are the goals here.
It’s worth adding that, because these are QA tests written by LLMs, they won’t have full coverage. In fact, if you want to reduce the error rate, it might be worth adding some further context about your specific website and specific QA guidance. To do that, update the relevant prompts in n8n.
Step 8: Output and integration
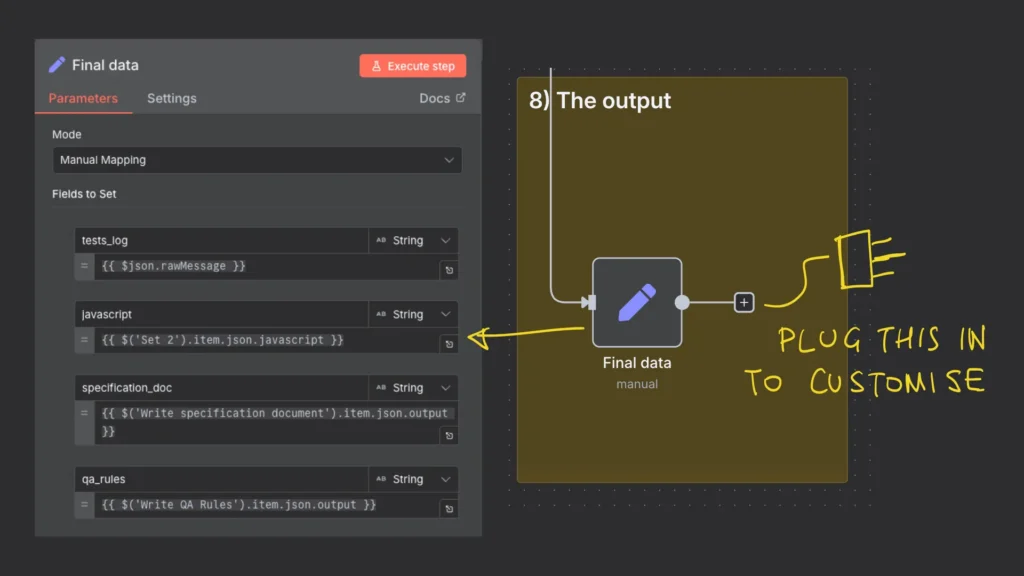
If it all works, you’ll get the following output:
- The technical specification document
- The QA rules which it used for QA
- The JavaScript for the change
- The results of the automated tests
From here, you can plug this output into your system to automatically pass this JavaScript to your testing tool.
A Few Final Notes on Using This
So, do I recommend you just download this and deploy it? Maybe.
I think it’s better to treat this as a starting point. Meaning, tweak the workflow, add your domain-specific context, and, in general, just make it your own. Also, make sure you test it with your own context, on your own site, and remember that this automation is not about replacement; it’s about augmenting your teams and processes.
For example, here’s an idea: why not take the output from this workflow and create requirements for your developers and QAs to test? Or take the JavaScript and push it into your experiment tool?
Okay, so I promised there were broader takeaways here, in terms of the techniques and approaches you can apply to other workflows. There are a few to point out.
First, before getting a language model to write code, it’s a good idea to think carefully about the output and how we’ll validate it. In this case, how are we going to validate the JavaScript? This thinking is encoded into those specification and QA documents that we got AI to write. In a way, this approach is not much different from a “traditional” process where a well-written story always precedes development and QA.
Second, note how the tests are explicitly written in JavaScript. This is to prioritise determinism in our workflows. You see, tests written in JavaScript are predictable, consistent, and reliable. Language models and Agents, on the other hand, are inherently non-deterministic, meaning their output is less predictable, consistent, and reliable. Taking control over the workflow generally leads to more reliable outcomes.
Which leads to my final point: a serialised workflow ensures tighter control over the experimentation development process. The design of the workflow is deliberate and rigid, meaning each and every step (or node) is important as we work towards the final code.
Anyway, enough from me. Here’s your download, and I hope you enjoy it.
Mobile reading?
Iqbal Ali
Experimentation consultant and coach.